Thursday 24 September 2015

SCW: Battle of Illesca

Another AAR.  We seem to have had more wargames this year than in the last ten put together, which is of course a good thing as it concentrates the mind and gives us a chance to find out if those rule sets off the internet, which look good on paper, actually look good on the table.
Basque anarchists hiding behind a wall
The set up here was a Spanish Civil War (SCW) game using a free set of rules called Honour the Dead and the scenario was meant to represent an action from the Republican advance on Madrid in October 1936, at a village called Illesca.
It all seems rather quiet.  Too quiet.
The playing area was Geoff's kitchen table and the terrain and figures were his.  The troops were mainly from Warrior's 20mm SCW range, with the Republicans (attacking) comprising three companies of infantry supported by a Matchbox Renault FT-17 tank.  The Nationalists had a company of Falangists, a company of Moroccans, 2xHMG and a 75mm field gun, with the job of defending the village.
Republicans start to advance.
Due to the narrowness of the table and/or a faithful recreation of SCW tactics, the Republicans attacked directly towards the village in line formation, preferring not to advance through the cover of the woods and rough ground flanking the village.  The Nationalists were generally hidden within the village itself although the Falangists decided to jump over the wall into the graveyard in order to defend the wall nearest to the enemy, thus making themselves visible.
Man struggles with frozen eel as Falangists move through graveyard
The Republicans continued their advance with the Renault taking fire from the 75mm (which missed) which in turned fired at the Falangists and missed.  The rest of the Republican infantry continued to move forward.
75mm field gun with Russian crew
However, in the next move the 75mm managed to immobilise the Renault and general firing from the previously hidden defenders commenced with some effect, with the Basque anarchists taking particularly heavy fire from the Moroccans and the supporting HMGs.
Basques trying to get into cover ASAP
In the next move the Renault was hit again and the crew bailed out so that was that.  Meanwhile the infantry continued their advance through steady, though oddly ineffective, fire from the defenders.
Republicans advance past immobilised tank.
By the next move the Republicans had managed to get to the graveyard and after a swift tussle threw the defending Falangists back.
Republicans at the walls
Meanwhile the Basques had reached the convenient wall in front of them but were pinned down.
Basques in position, unwilling to advance further
By this point we were running out of time, but after some heroic die throwing (and by manhandling the 75mm up to a better position) the Basques started to take some serious casualties and were quickly finished as an effective fighting force.
Some of our Basques are missing
At that point we had to leave it but the overall situation was that the Republicans probably weren't going to win as they had no heavy support and they had been stopped in the centre entirely.
Situation at the end of the game.
Overall, it was an OK game although the rules seems a bit laborious as units had to inflict/accumulate multiple Disruption Points (DP), influenced by Morale Ratings and Ability Ratings, and after a while DP were translated into elements to be removed, (eventually) resulting in reductions in fighting ability.
HMG on the roof AKA "The Basque Suppressor"
DP could go up as well as down, being 'rallied off' meaning that even though a unit had been under sustained fire it did not necessarily follow that there would be anything wrong with them after that. Anyway, that's another set of internet rules tried out and ticked off, so on to the next!

Friday 18 September 2015

Not Even Push of Pike

Like most wargamers we tend to spread ourselves too thin.  We have many wargame periods in mind or in progress, lacking only the necessary research for armies to be readied, be they incomplete, unpainted or just plain unbought.  The odd thing is that it is the completed periods that seem to be thought about and played the least.  I don't think it's just us.
Spot the deliberate mistake.
One such period is the English Civil War, for which we have, according to the WRG De Bellis Renationis (DBR) Army Lists (Vol 2), about 400 points each of the respective Parliamentarian and Royalist armies (1641-1648), which is near enough complete as makes no difference.  These are 1/300 Heroics & Ros figures, mainly painted by Geoff sometime last century, but supplemented by some Scots musketeers, cavalry and artillery train added by me in more recent years.

The last time we'd had a game from this period was about 15 years ago and we used WRG DBRv1.1 whilst working our way through the smaller scenarios from the De Bellis Civile books (published by The Keep).  However, for this game we didn't use any particular scenario but decided, just like in the old days, to generate the terrain using the rules, line up opposite each other and see how we got on.  Anyway, the set-up turned out like this, with Parliament (blue) defending.
All terrain made by me, including houses from polystyrene offcuts & cardboard
Forces were as follows, each split into two commands:
Parliament
            1   CinC Pi(S)               1    Sub Gen Pi(I)
            1   Pistols Pi(S)            10  Pistols Pi(I)
            16 Shot Sh(O)               3    Dragoons Dg(S)
             8   Pike Pk(O)              1    Galloper Art(F)
             2   Sakers Art(O)

Royalist
           1    CinC Pi(S)                1    Sub Gen Pi(F)
           12  Shot Sh(O)               12  Horse Pi(F)
            6    Pike Pk(O)               2    Dragoons Dg(O)
            2    Sakers Art(O)           1     Galloper Art(F)

Rules used were actually DBRv2.0 which, we discovered, had some subtle but significant differences when compared with DBRv1.1.

Anyway, my plan (i.e. the Parliamentarian plan) was to hold the left secured against the hill, whilst trying to sweep around the right with my Pistols Pi(I), i.e. the Roundhead cavalry, pivoting on the village which would be occupied by one regiment of foot and some dragoons.  The left wing comprising mainly foot was supposed to stay where it was and be stiffened by the sakers positioned above them on the hill.
View of Parliamentarian lines from the Royalist left.
The thing is that defending passively doesn't come naturally to me, so almost immediately I commenced advancing my infantry on the left.  My cavalry on the right meanwhile started to move towards the enemy's position, where his cavaliers (Pi(F)) were climbing up the far side of the hill.
View of Parliamentarian left, with sakers on the hill

On the left I was having issues.  I realised that my sakers on the hill were poorly sited because being uphill from the target reduces their fire effect (presumably as the cannonballs tend to bury themselves when fired downhill, or something), and the regiment of foot up there really wasn't going to do anyone any good.
Parliamentarian foot in the BUA, dragoons to the fore
In addition, my infantry started to take casualties from the Royalist guns sitting being the marsh, whilst the regiment of foot that I had positioned behind the village was unable to move through it at any great speed.
Familiar foot advance
My Parliamentarian foot continued to advance to try to contact the Royalist foot that was moving up opposite, all the while taking casualties from the guns and then Royalist foot, both sides starting to lose cohesion but without my troops able to damage the Royalists enough.
Ebb and flow on the left as shot exchange fire
Meanwhile on the right, the Roundhead cavalry advanced to the foot of the hill accompanied by a galloper gun and some foolhardy dragoons.
Roundhead Pi(I) advance on the right
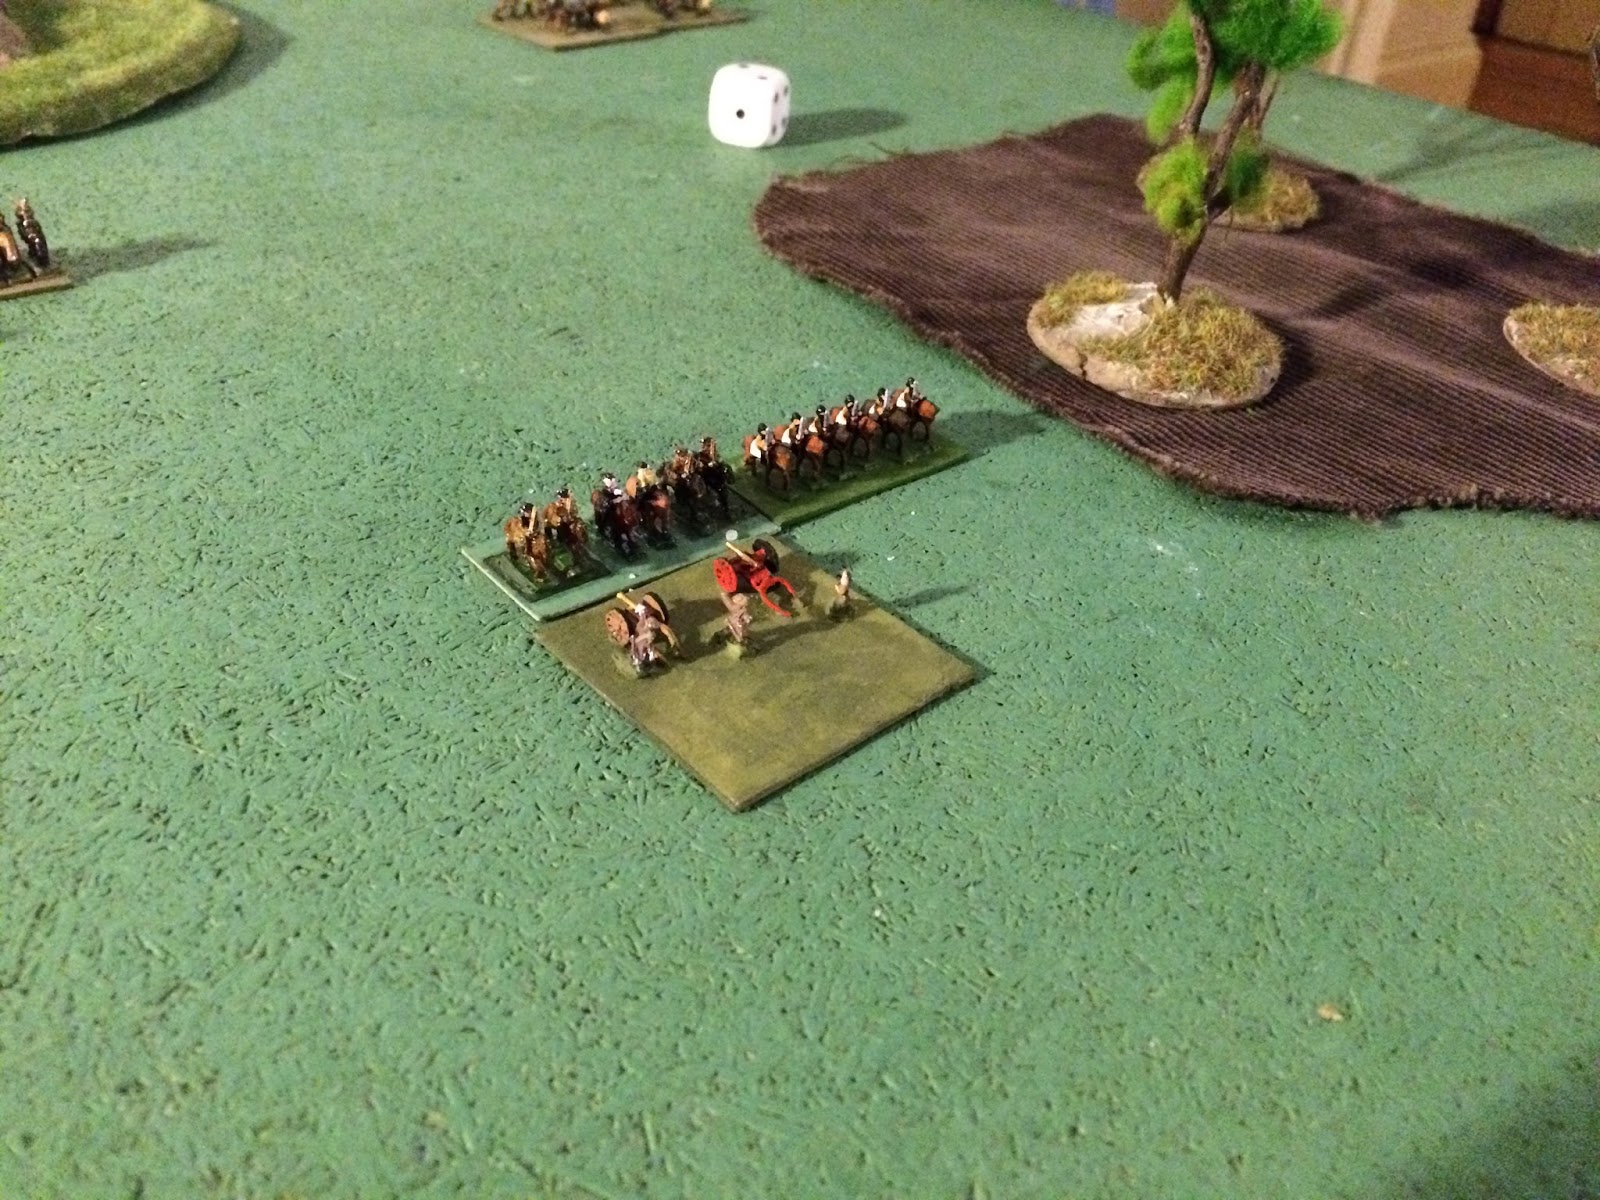
As the Roundheads reached the foot of the hill the Royalist cavaliers come over the crest and down the hill but are checked by fire from the Pi(I).
Roundhead cavalry push up to the hill
However, the fire from my cavalry dishcarging their pistols momentarily checked the cavaliers, but was not enough to discourage them and they charged down the hill into the Parliamentarian ranks, surrounding and overwhelming them within a few moves.  My cavalry command was therefore quickly demoralized (although for some reason I neglected to take a picture of  my cavalry surrounded and reduced to a single element in about two moves).
Stalemate on the left, but the cavaliers are coming...
Back on the left, the Parliamentarian foot were being gradually depleted but weren't quite able to get into phyiscal contact with the Royalists, the desired for 'push of pike'.  However, with my right wing effectively wiped out, it would only be a matter of time before the cavaliers were behind me and that would be that.
Cavaliers about to sweep away my galloper
Overall it was a fairly decisive battle, although we did notice a few signficant changes from DBRv1.1 to DBRv2.0.  The earlier set encouraged the use or separate units of foot (i.e. 4 elements wide with a block of pikes in the middle) but v2.0 was more like DBM where you could have an infinite line acting as one group if you wanted to (and had a table long enough).
View from behind Royalist lines
However, the main issue was that the Parliamentarians (me) made some basic errors, such as wasting a regiment of foot by placing it behind the BUA and another one on the hill so that neither could get into the action, which was an inefficient use of troops, particularly as I had chosen to advance off the hill and out of cover anyway.

Further, placing my sakers on the hill made them less effective and my dragoons (Dg(S)) were not used properly to hold the BUA and woods.  Next time I think I will keep the Pi(I) in reserve behind the foot and make the enemy come to us!

Friday 11 September 2015

Home Made Sea

Being a) quite keen on naval wargaming and b) a bit of a cheapskate, I've been admiring the excellent sea mats made by Terrainmat, but thought I could maybe make one myself.  So I have.
Otranto
My inspiration came from the tutorial for terrain mats on Tobi's Paint Pot blog.  Here's what I started with.
Basically, I used a decorator's dust sheet from Amazon and some tubes of acrylic sealant from B&Q.  I didn't use the whole sheet but cut it in half to end up with a panel about 200cm by 140cm.  Here is the section with a 1:3000 scale Navwar warship (HMS Inflexible) on it for reference.
I made a spreader from some hardboard with the intention of getting the acrylic as thin as possible, but with some 'wave' textures on it.  I used one of those 'sealant guns' that look like a stripped down Sten gun (and probably just as accurate) to dispense the acrylic.
Once the acrylic had dried (I'd left this for about 12 months between application and painting: it doesn't need that long, a couple of hours should do it, but it just turned out that way) I painted it with some gloss blue paint.  I ended up using expensive Hammerite Garage Paint because I couldn't find any gloss paint I thought was right.  Although this was the desired colour for me ("Oxford Blue") it was a bit of a pain because it took over four hours to dry (and needed white spirit to clean the brush).
Anyway, once it was ready I dry-brushed the sheet with some white emulsion.  If I'd been more patient I would have eradicated all fold lines before I'd started to put the acrylic on (using an iron?), but the whole thing was a sort of experiment anyway, so I'll know what to do next time.  And here are some posed shots of it in action.
These are Navwar WW1 battlecruisers HMS Inflexible & Inflexible with light cruiser HMS Glasgow on the move (somewhere in the vicinity of the Falklands, no doubt).
SMS Scharnhorst and Gneisenau, with Leipzig and Nurnberg in the background.  For my ship bases I'd dry-brushed on some sea-green to tone down the blue before adding the white highlights.  I was too lazy to do that for the sheet (also I didn't have enough of the right green anyway) but may revisit it at some point if I think it is necessary.
And here is the Emden, posing by one sinking freighter and about to go after another.  Anyway, hopefully we will be seeing more of my new sea terrain and even these models in action before long.

Saturday 5 September 2015

Claymore 2015

I know it was a month ago (always the first Saturday in August) but I've finally got around to uploading my pictures from Claymore 2015, which is put on every year by the SESWC in Edinburgh.  For the first time I took my son who is 12, so it was interesting to see his reaction and/or indifference to the games as the case may be.  Anyway, here are some photos.
These are a couple of shots from a Very British Civil War game.  My son was intrigued by the various factions on the table including Mosley's BUF Blackshirts (or whatever they were). 
When their political sympathies were explained he loudly hissed the word "Fascist!" in the style of the landlady doing the crossword in the film "Hot Fuzz" at the point when Sgt Angel turns up at the hotel.

The following are some pictures from a Gallipoli game (I think) with French troops attacking a Turkish position.  I rather liked the scenery and set-up.  I think this was put on by the RAF Leuchars Wargame Club.


However, this was the game that my son was most interested in, a public-participation Halo box set game developed by Spartan Games.  Apparently there is a quite popular electronic version of it on the X-box thingy.  Not my bag really (starter set reduced to only £60!), but he enjoyed it (for an hour or so until we dragged him away), chucking armfuls of dice and giving weaponry tips to the game designer, allegedly.

Finally, some pictures of a Vietnam game.  I was particularly interested in the vegetation as I've a few packages on the way with various artificial plants in them that I needed inspiration for.

Overall then another enjoyable day spent wandering around the tables and wondering how the students at the Edinburgh College can live long enough to graduate if they risk the catering more than once a month.